Short John Silver Work
Well here we go with another test of the whole magilla, minus photos until I can figure out how to upload them. Some of the following is pasted from Arachnophilia; let’s see if this works..
June 6: Well this morning I finally hooked the towing hitch up to the tractor, moved the steamboat out of the way and, with Gothalot’s help, we got Short John Silver moved under the carport. While I cleaned the carburetor he got the big-ass battery transferred from the truck to the electronics bay, then got the sparkplug de-gunked. This evening just at twilight I powered up the various lighting circuits and to my delight I only had two problems: the one caused by the too-sharp radius bend on the starboard side’s yellow outline and the lack of two channels on the waves, due to the lame 3-channel sequencer. I can fix the yellow with a new strand and a widget I’m going to machine to ease the sharp bend. But I’ve gotta find a new source for sequencers as Cool Neon doesn’t carry that brand any more.
After the superficial stuff is fixed I’ll set to the problem of adding extra carrying capacity. The DMV has ruled that “personal transport” is veboten now and taxis are the ‘preferred embodiment’ for mutant vehicles. Well, in the words of Edmund Blackadder “I’ve got a cunning plan”, heh. By towing a cart I can increase my carrying capacity by about 66% so I’m in the process of creating a “dinghy” that can be towed by Short John. Gotta get more EL wire it seems. I also plan to carry the ‘waves’ aft but for the ‘water line’ to be the same I’ll have to lower them on the main vehicle. This means I’ll have to scrap my plans to add flora and fauna below the waterline, which means I won’t be able to increase the artsy-fartsy aspects of the project as I would have preferred. Ah, well, DMV gets what DMV wants and I get to save a bundle I would have had to spend.
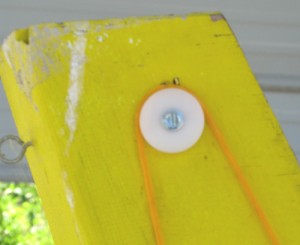
Spent most of yesterday making Delrin widgets that will allow EL wire to turn fairly sharp corners without endangering the skinny wires inside the colored jacket. Started with 1-1/2″ rod but also turned some down to 1-1/4″ and finally 1″dia. Groove is about .130″ wide and about .050″ deep, which allows the EL to nest nicely, but still be visible. Holes in the centers were drilled 11/64″; i.e. clearance for a #8 screw. I’ll mount 4 of them up near the bow today, using hex head sheetmetal screws, which I favor.
Meanwhile back at the ranch the calliope has reached a point where it’s totally out of the workshop and residing on the electronics bench upstairs. next project will be tuning, but that’s a little hard with my brand new Panasonic Toughbook on the fritz with not one, but two software/hardware issues ongoing and unfixable until I can get hold of a techie to fix it.Once that’s sorted out I’ll hook up the microphone and do the whistle tuning. Once tuned I’ve still gotta finish wiring the last three whistle solenoid circuits that wouldn’t fit onto the only available size circuit board I could find. Aside: had to order new proto boards from Radio Shack as none of the three extremely lame local RS stores didn’t have any in stock. 4 have arrived and should provide spares as needed on short notice. I’ve also snagged a variety of standoffs from HSC so I can piggyback the original 9 circuits to the remaining 3 in a fairly compact arrangement.
June 14: DMV has been wanting some photos of Mutant Vehicle progress so here goes!
Delrin widgets so EL can turn a corner under tension.
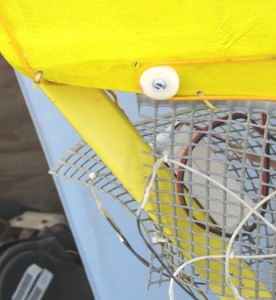
Same thing only different. This one’s located on the bow, portside, at the “water” line.
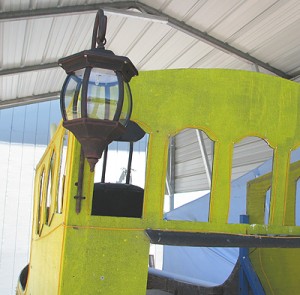
Shot of one of two new faux kerosene lanterns. They’re solar powered so there is no further electrical wiring.
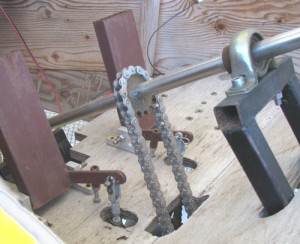
Learned my lesson in years past and finally got around to swapping out conventional roller chain for stainless roller chain. Big difference and no gummy chain clogged with Playa dust!
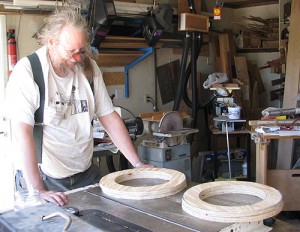
Waiting for glue to dry on pairs of plywood risers. These will support swivel stools on the “dinghy” that will be towed by Short John.
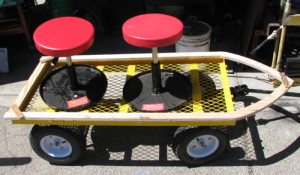
Shot of “dinghy”. Still a long way to go but it’ll be shipshape in plenty of time! Next up: bolt stools thru plywood riser donuts to steel reinforced cart deck, then a painted canvas “hull” will be attached to frame, followed by EL accents and sequenced, rolling waves beneath.
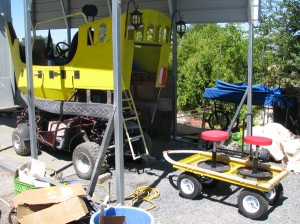
Initial lash-up of dinghy and Short John Silver, to get an idea of geometries for tow hitch. Connecting the dinghy hitch directly to the lower rung of the boarding ladder (which is steel and bolted to the frame) solves several problems. In addition to a hitch there will be a power umbilical to run EL and CCFl stuff off of Short John’s monster battery. Metal hitch bar will be ‘twined’ with yellow EL, to make it resemble a rope.
