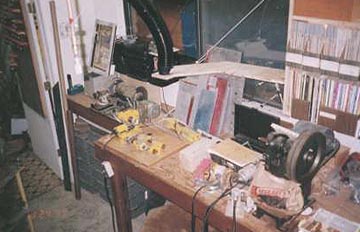
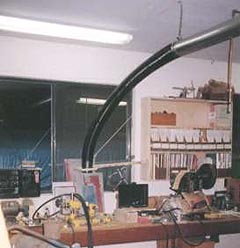
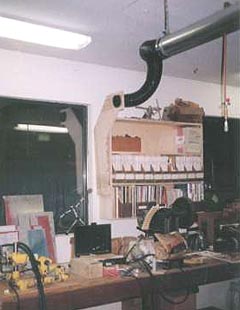
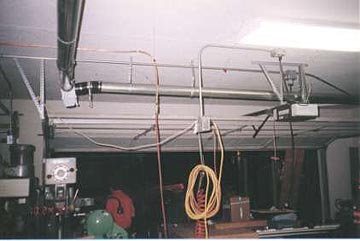
After I'd sorted out my new shop a bit I started addressing safety issues like fumes and dust coming off of various machines. In the past I'd made do with the 2-strap dust masks, open doors and the occasional fan. But ideally whatever shit was ejected from the work at hand would be sucked directly out of the shop and into a bag. Initially I copied the system employed in Bryan Mumford's wood shop. Most of the parts needed for a basic shop exhaust system can be found in the Trend Lines catalog and the 4" metal ducting came from a local sheet metal shop. Total cost of all components (excluding the shop vacuum) was around $100.
Sure enough, just as I had become familiar with the system it was time to expand the shop, so everything had to be torn down and redone. So that I didn't have to grab a stool, twiddle knobs and slide doors back and forth I took this opportunity to install a control panel of switches to open and close individual gates. To my horror I found out that even the most basic system was outrageously expensive; to equip my shop with the electric gates that are available would have cost more than $1,000! Screw that; I designed my own system, using pneumatic switches and air cylinders. It cost me a much more reasonable $40 per gate and I was able to fit these mods onto the original system. it's safer, too, IMO because there's no danger of sparks igniting dust or shocking yours truly.
I also moved the vacuum from the windy side, to the downwind side of the shop and I enclosed it in a shed to keep the damp off the motor.
Oops, spoke too soon about the safe-ness of the system; I recieved this letter which points out the errors and suggests corrective action...
Date: Mon, 04 Oct 2004 22:15:41 -0500
From:
dtdurrant@frontiernet.net
To: steamer@sonic.net
Subject: dust collector
Hello Ed:
Just looked at your dust collector info and have a few thoughts to share with you. My thoughts are based on owning a wood moulding mill for 18 years and moving a lot of dust and shavings and other shit pneumatically - -and I mean shit quite literally because I had German Shepards guard dogs for much of that time.
Here are the thoughts:
Try not to transition plastic or rubber into sheet metal duct because there is a lot of static electricity built up by air moving through blow pipe. There needs to be continuous circuit or you will have sparks -- metal into metal into metal, etc -- or at least jumper the gaps.
No hot work processes in the same pneumatic circuit with wood dust, shavings, etc. Grinder dust can be hot enough to start a fire in your bin.
Wood flour is just as explosive as gasoline. What is wood flour? It's the real fine stuff that collects up on the beams and barjoists in the shop. Don't believe me, try scraping some of this stuff into a coffee can and holding a lit match near it on a dry day.
Use wide sweeping wyes and tees for all connections for best efficiency.
Install your fan on the "clean air" or discharge side of your collector or cyclone.
Here is a dependable supplier for dust collector duct work parts:
http://www.spiralmfg.com/home.htm
Hope this helps.
Best Regards,
Dave Durrant
|
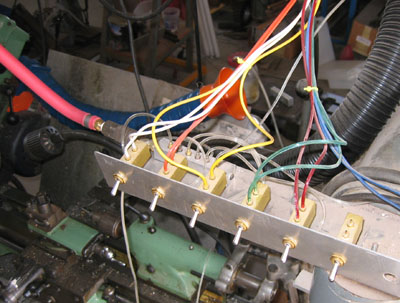
Photo #7: Here's the main "control panel", which I bolted to the unused tang on the back of my Bridgeport. I spent a little extra dough and bought pneumatic tubing in a selection of colors, so I could color code the switches to their gates. These pneumatic switches are from Clippard; part number MTV-4.
|
|
|
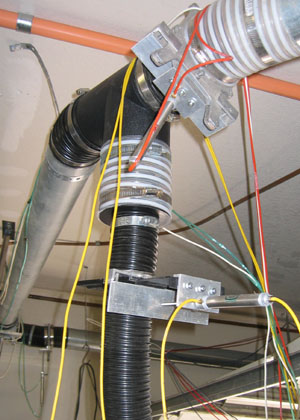
Photo #8: What a rat's nest! Early stages of laying out runs of tubing to/from cylinders that operate the individual gates. It's a good idea to have a gazillion zip ties and a really good pair of wire cutters, so that you can nip them off without damaging the tubing.
|
|
|
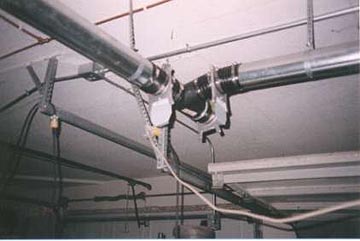
Photo #9: A semi-tidy installation of tubing at a junction of two gates.
|
|
|
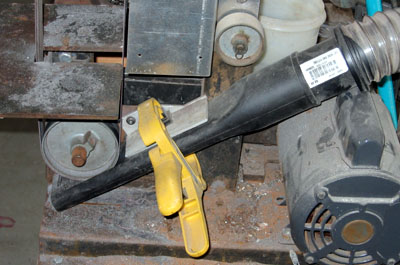
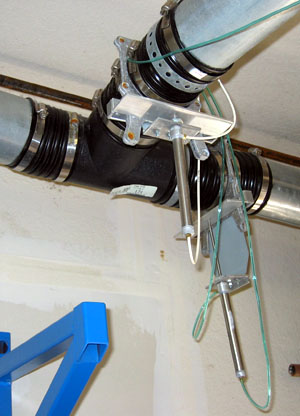
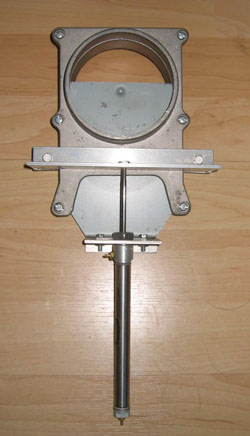
Photo #10: Here's the heart of the system. Not much in the way of complexity, it's just a 1/2 in. bore, 4 in. stroke double-acting cylinder, Clippard part number FDR-08-4, threaded into a small bit of 1/8 in. thick aluminum angle that is itself bolted to the bent end of a blast gate. The #10-32 threaded end of the cylinder's piston rod is threaded thru a larger bit of angle and made fast with a jam nut. This larger aluminum angle is fastened around the blast gate body with two clamps on the back side. These clamps are just two more short bits of aluminum angle, tapped #10-32 and tightened in place with hex bolts.
|
|