March, '08   Works in progress

March 1-31: Had to do a boring, repetitive production job to help pay the bills (Blue Cross raised our rates for a third time; now the nut is $1,800/month!!). Have been working on cannon, setting it to rights. Grief mostly behind me but Sandybear is still missed in the shop. Buddybear's staying pretty close these days and so is Shadow. Melanie roams as usual, none the worse for the change in lineup. Sigh...

Last year around this time I got to shoot my cannon for the first time and in so doing learned a lot about the proper kit one must have on hand. I've spent the past few weeks noodling on what's needed and making up a proper set of tackle so that I'd be ready in time for the next Big Event, which is scheduled for Saturday, April 5.

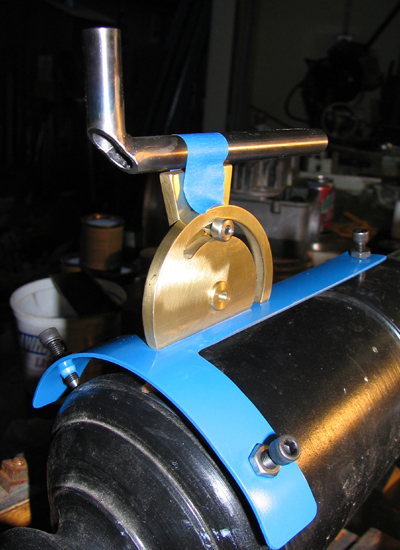
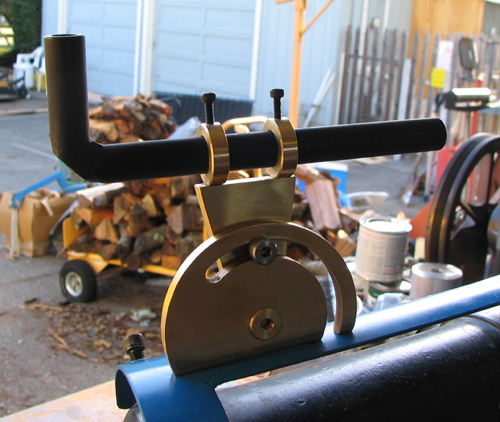
The first thing I needed to organize was a better method of aiming the beastie. Last year I missed the targets completely and managed to snap branches off of a nearby tree three times! I did quite a bit of searching around for what I wanted and failed completely, so I wound up making my own whatchacallit. It looks OK; the real test will be whether or not it works tho...


Photo #1: Here's the base of the sighting mechanism. The trick is to make it removable but repeatable, so that it isn't knocked out of kilter by the large recoil. This is done by drilling three shallow cones into the barrel, then using pointy setscrews to register the assembly in the depressions. Here I'm fitting some brass parts that will control elevation. Right/left alignment of sight is adjusted by loosening brass assembly's forward mounting screw so it can be traversed along a milled slot in the forward arm of the blue bit.
Photo #2: Remembering that this is a scale model cannon and having no desire to crawl on my belly to align the sights I opted for a periscope, but try as I might I couldn't find one that cost less than a fortune. In desperation I made my own. Here it is, about half-complete and taped to its eventual mounting plinth. The circular brass section with the curved slot came straight out of the scrap bin. I sawed two pieces of 1/4" pipe at 45degrees, welded them together, then sawed off the back to expose the intersection. I'll glue a mirror here eventually.
Photo #3: How to bond plastic mirror to steel pipe? Gorilla Glue did the trick. Here's the final incarnation, with mirror ground to match contours, then tube painted black and secured in two brass rings, via setscrews. The largest thread I could cut in this thickness was 6-32 but I trust #5-40 more so all fasteners are this size. No magnification or crosshairs, but it does let me see downrange without breaking my neck! Once I have an idea of ranges I'll scribe lines on the movable bits.

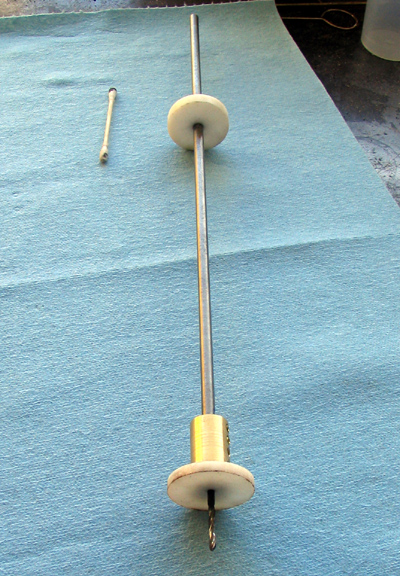
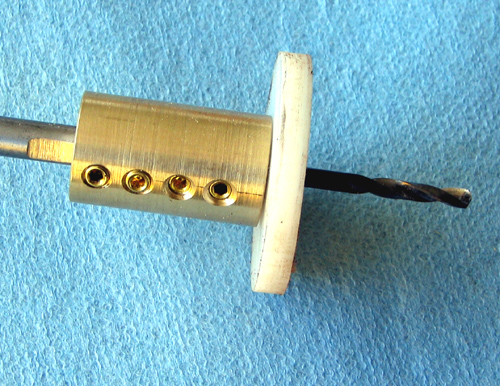
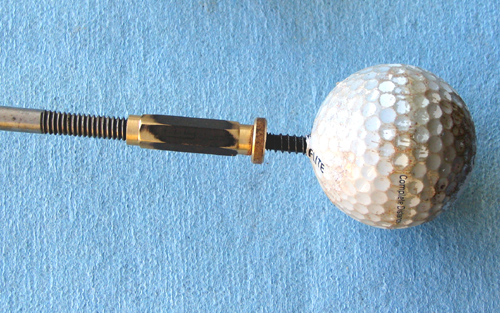
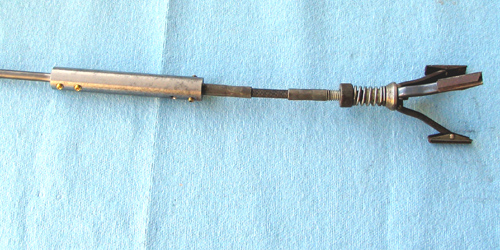
Dunno how it happened but, while making an extension to my honing tool, so's I could do a thorough cleaning job on my cannon's innards, I discovered that not one but two golf balls were stuck in the barrel; gremlins!! The first one came out with little effort but the last one was a real stinker. I wound up making a couple of tools to do the job; not so good for field work but adequate for use in the shop. What's needed in the field is a proper worm, but I've yet to find one made in the correct 1-11/16" diameter.

Photo #4: Step one to persuade a stuck ball out of the cannon: drill a hole in the outwardmost end. Had to make this drill extension and coupling to do the deed. Extension is 1/4" and drillbit is 1/8". To make sure the hole was in the center of the ball I whipped up a couple of Delrin disks to keep the drill on target.
Photo #5: Closeup of coupling nut; nothing fancy, just a hunk of brass and some #8-32 setscrews to hold everything together.
Photo #6: Step two is screw something into the ball and give it a yank. Went to the gun store and spent a few bucks for a ball puller; i.e. something with a pointy screw on the front end and a #10-32 threaded back end. Made the rest myself, rather than pay $21 more (!!!) for a simple T-handle rod. Got the ball out on the first yank: very gratifying!
Photo #7: Next up: clean out the grunge. Made another shaft extension and raided my steam engine kit for a cylinder hone. I used some LPS-1 to lubricate as I went and the results, while far from perfect, are adequate.

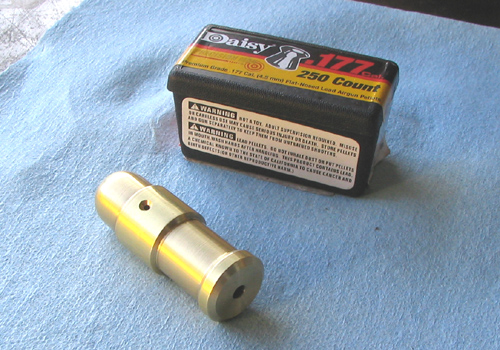
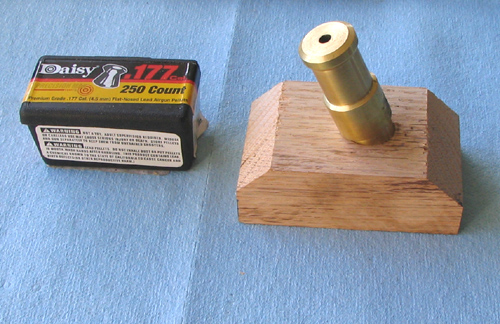
Somewhere in the midst of my follies I chanced upon plans for a "nano mortar" and I had to spend an hour or two making my own version. So far I've been unable to make it work worth a damn, but it looks cute. Hopefully I'll figure something out to improve its performance when I meet with the experts next weekend.

Photo #8: Here's the bad boy, fresh off the lathe. I bored it .177" plus a smidge, using a #16 drill. Box of pellets (I couldn't find any BBs!!) for scale. I loaded a pellet, put 70psi shop air to the 5/64" touch hole and THWACK! Pellet shot clear across the shop; very promising, yes?
Photo #9: Mortar attached to its carriage, aka a hunk of oak from the scrap bin. Taking all precautions, wearing gloves and ear protection, I was pretty disappointed when the first pellet shot an underwhelming seven inches in the air! Adding more powder and using a patch didn't help; pellet didn't even come out of barrel that time! Gotta use compressed air to get the pellet out I guess...

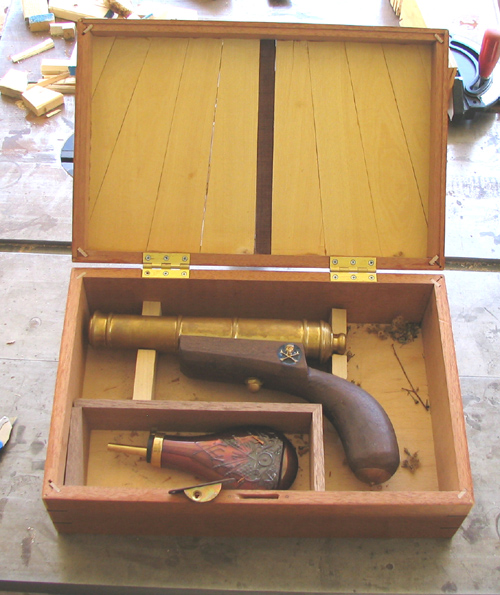
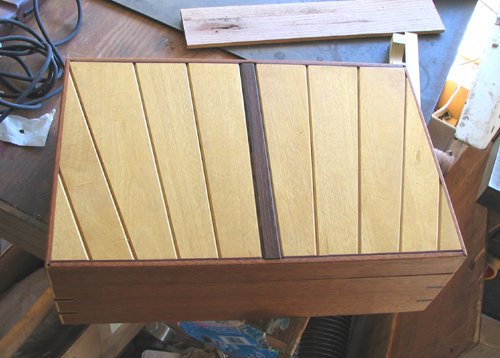
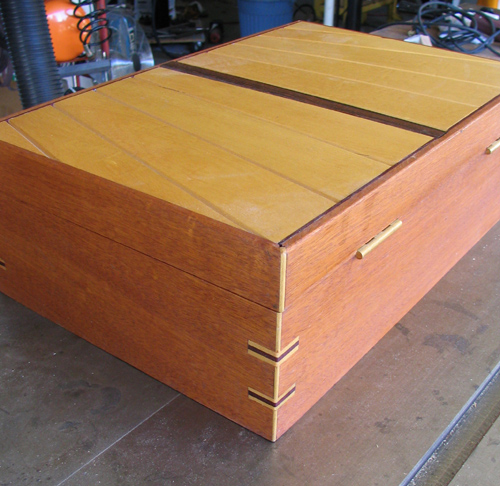
I plan on taking one other popgun to the cannon shoot. It's one of 40 replicas of the one used to start the bang-and-go-back steamboat race wherein Jessie James and the gang at Monster Garage challenged all comers. All the captains had a chance to buy one of these 'starting pistols' from the maker, who just happens to be hosting the cannon shoot. Long story short: Bruce is a fantastic machininst but the gun came in a packing crate that didn't do the thing justice. I spent a few months learning how to make boxes and this is the result.

Photo #10: Here's the popgun in my partially-made display box. The gun lacks a trigger so it's technically a hand cannon, requiring a lit fuze to fire. Bore is .75 caliber, but the massive barrel makes the kick barely noticeable. In fact it's so heavy I intend to make a monopod to support it. I'm thinking it would be kewl to make something similar to what was used to support an arquebus. Have yet to figure out how to dress box lid on the inside; first I'm fitting the latch.
Photo #11: View of display box from above. Top is made from Yellowheart pieces, tapered and bevelled on their mating edges. Sides are made of Honduran Mahogany, with Purple Heart trim. Center post is Cocobolo.
Photo #12: Shot of corner detail. There's much I'd do differently if I ever get around to making another box. I've counted nine mistakes; an expert could probably find more. Still and all, to the casual observer it ain't too bad. Wouldn't give it as a gift, but it's plenty good enough for me.

Return to Works In Progress