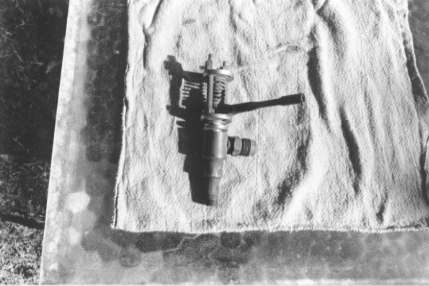
Photo #1 shows a 3-drum Yarrow semi over-discharge water-tube boiler (identical to the one in my steamboat). It is made of copper and it has 39 sq.ft. of heating surface. The mud drums are 3in. dia. and the steam drum is 6in. dia. The downcomers are 2in. dia. and the four rows of water tubes are 1/2in. o.d.
When I first got my hands on this boiler I tried to fire it with a kerosene vaporizing burner and thereby hangs a tale for another day...
Nowadays I fire with wood, preferring to use what Dick Vennerbeck calls "Gourmet Racing Wood", i.e. those varieties which burn clean, long and hot. So far the best I have found is Pear wood, although I hear Manzanita is the best. Unfortunately, although it may be a common "weed" in other parts of the state it is an endangered species in Santa Barbara!
This boiler was made by Pete Moale, who now lives in Northern California, in blissful ignorance of the web! ;-)
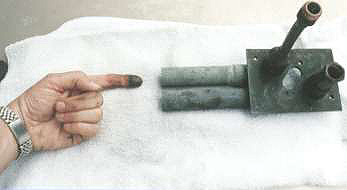
Water Tube boilers are great steamers, but they have a limited "top end" of about 200psi. To get more pressure it takes a monotube or pipe boiler (I hope to build one some day!) Photo #2 shows a selection of bending tools built by my steam guru, Jim Tangeman. These are used to bend the serpentine sections used in uniflow or pipe boilers, which consist of butt-welded sections of black iron pipe or stainless tubing. The trick is to bend the tubing as tightly as possible without causing stress cracks or deformation. This is done by supporting the tube all around its circumference, during the entire bending operation, with inner and outer dies having semicircular channels all around. A tang is welded to the fixed inner die, and a gnarly big handle is welded onto the forming die so that it may be held in a bench vise.
The work to the left of the photo is a section of 1/4in. black iron pipe which has been bent to a typical radius.
In practice, bends would be alternating left- and right-hand in order to produce a grid. To do so requires two die sets, one right and one left-handed, otherwise as the boiler grew in size and became more convoluted it would become impossible to free the mess after each new bend. Photo #3 illustrates the offset of one inner bending die, relative to the section that holds it in a vise.
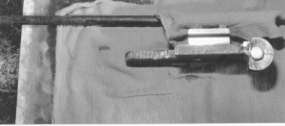
Photo #4 shows a set of dies suitable for 1/8in. black iron pipe. Jim says that a boiler made out of 1/8in. pipe can be bent up without a formed semicircular channel in the tool, since the pipe is sufficiently strong and small to be bent without excessive deformation. The pin to the bottom of the photo is the pivot that aligns the outer to the inner bending die.
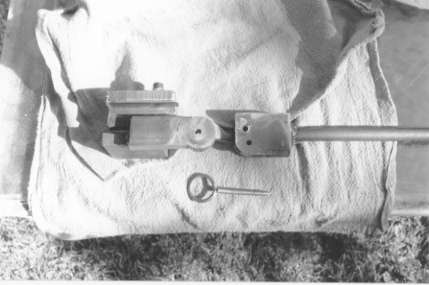
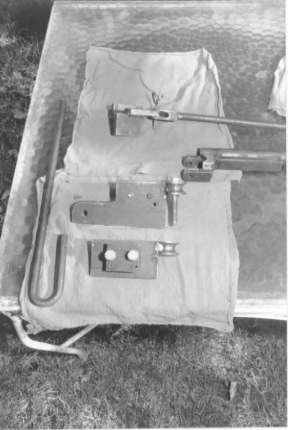
Photo #5 illustrates Jim's completed boiler, which is barely 12in. wide and 18in. deep. Through the open top can be glimpsed the top row of water tube bends. Note also the neatly bent pipe leading to the pressure gauge.
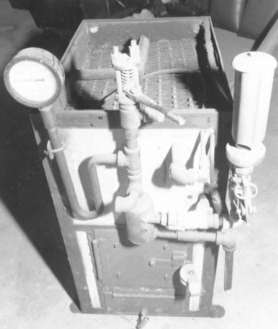
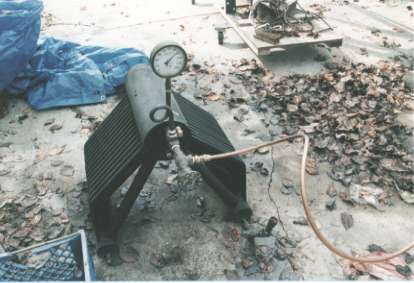
Of course, if you do build one of these beasties you can expect *very* high temperatures and pressures. I have seen Jim's Stuart single-cylinder engine: high steam temperature has burned the paint off of its cylinder! Temperature gauges are common for these ranges, but safety valves are not. Jim says that the one essential feature of such a safety valve is an external spring in its design. Without this feature, steam blowing past the spring would be hot enough to anneal the metal, causing it to quickly fail. Photo #6 shows Jim's home-made safety valve, which is set to pop at 600psi. The projecting handle allows him to trip the valve by hand, in order to test it and to reseat the valve if it doesn't behave.